
superset是由Airbnb(知名在线短租赁公司)开源的数据分析与可视化平台(曾用名Caravel、Panoramix),该工具主要特点是可自助分析、自定义仪表盘、分析结果可视化(导出)、用户/角色权限控制,还集成了一个SQL编辑器,可以进行SQL编辑查询对结果集进行保存可视化等。
1、superset基本介绍
我们已经了解到了superset是一款数据展示的工具,接下来 一起来了解一下superset的基本介绍。
核心功能:
1.快速创建数据可视化互动仪表盘
2.丰富的可视化图表模板,灵活可扩展
3.细粒度高可扩展性的安全访问模型,支持主要的认证供应商(数据库、OpenID、LDAP、OAuth 等)
4.简洁的语义层,可以控制数据资源在 UI 的展现方式
5.与 Druid(其实它貌似就是为了druid而生的)深度集成,可以快速解析大规模数据集
6.快速的通过配置装载仪表盘等
2、superset的安装
前面我们已经了解到superset的作用,接下来我们来进行superset的安装
第一步:linux验证python的环境
superset的安装运行需要依赖于python3的环境,我们这里安装使用的是centos7的linux操作系统,但是centos7的操作系统自带的python版本是2.x的版本
使用python命令来进行验证python版本
$ python
Python 2.7.5 (default, Nov 16 2020, 22:23:17)
[GCC 4.8.5 20150623 (Red Hat 4.8.5-44)] on linux2
Type "help", "copyright", "credits" or "license" for more information.
>>> quit()
第二步:centos7.x安装python3.6版本
前面已经验证了centos7.x当中python的环境是2.x的版本,那么我们可以来给centos7.x安装python3.6的版本。
$ sudo  yum install wget
$ cd /usr/local/src/
$ wget https://www.python.org/ftp/python/3.6.0/Python-3.6.0.tgz
$ tar -zxf Python-3.6.0.tgz
$ cd Python-3.6.0
如果没有C编译环境则需要先安装, 执行:
sudo yum groupinstall -y "Development Tools"
$  ./configure --prefix=/usr/local/python
$ make
$ sudo make install
添加python环境变量
$ sudo  vim /etc/profile
#末尾添加以下内容
export PYTHON_HOME=/usr/local/python
export PATH=:$PYTHON_HOME/bin:$PATH

# 使修改生效
$ source /etc/profile
检查python是否安装成功
$ python3.6
Python 3.6.0 (default, Feb 15 2021, 18:19:33)
[GCC 4.8.5 20150623 (Red Hat 4.8.5-44)] on linux
Type "help", "copyright", "credits" or "license" for more information.
>>> quit()
修改系统Python的环境变量
$ sudo  mv /usr/bin/python /usr/bin/python-2.7.5
$ sudo ln -s /usr/local/python/bin/python3.6 /usr/bin/python
因为yum是依赖python的,所以这里我们修改了默认的python,就要修改yum,让其运行指向旧的版本
修改第一个文件
$ sudo vi /usr/bin/yum
# 第一行修改成如下配置
#!/usr/bin/python2.7
修改第二个文件
$ sudo vi /usr/libexec/urlgrabber-ext-down
#第一行修改成如下配置
#!/usr/bin/python2.7
至此centos7上面的python3.x的环境已经安装成功
第三步:安装容器和密码验证工具
使用yum源在centos7上面安装容器以及密码验证工具
安装必要的依赖
$ sudo yum install -y libffi-devel python-devel python-wheel cyrus-sasl-devel openldap-devel
$ sudo yum -y install gcc-c++
$ sudo yum -y install deltarpm
$ sudo yum -y install pcre pcre-devel
$ sudo yum -y install zlib zlib-devel
$ sudo yum -y install openssl openssl--devel
安装pip3
$ sudo yum install python3-setuptools
$ sudo ln -s /usr/bin/pip3 /usr/bin/pip
查看已安装的第三方库
$ pip3 list
...
pip (9.0.3)
setuptools (39.2.0)
查看具体某第三方库的安装位置
$ pip3 show pip
Name: pip
Version: 9.0.3
Summary: The PyPA recommended tool for installing Python packages.
Home-page: https://pip.pypa.io/
Author: The pip developers
Author-email: python-virtualenv@groups.google.com
License: MIT
Location: /usr/lib/python3.6/site-packages
Requires:
为了避免继续安装第三方库的时候显示没有权限,设置本地第三方库安装目录的所有者为当前用户
sudo chown hadoop:hadoop -R /usr/lib/python3.6/site-packages
sudo chown hadoop:hadoop -R /usr/local
继续升级和安装第三方库
$ pip install --upgrade setuptools_rust
$ pip install --upgrade pip
$ pip install cryptography
python3-pip包含在python3-setuptools里面网络原因下载失败可以多重试几次,如果还不行则考虑更换DNS、yum源或epel源。
第四步:安装Miniconda
miniconda是一个集成化的工具,可以给我们提供各种版本的python运行环境,我们这里通过miniconda来进行安装superset
下载miniconda安装的脚本,然后通过脚本来进行安装
$ cd /opt/download
$ wget https://repo.anaconda.com/miniconda/Miniconda3-latest-Linux-x86_64.sh
$ bash Miniconda3-latest-Linux-x86_64.sh
# 通过以下命令开始执行脚本
$ bash Miniconda3-latest-Linux-x86_64.sh
Please, press ENTER to continue
>>> 按下enter回车键
#license证书说明,一路一直按enter回车键
Do you accept the license terms? [yes|no]
[no] >>> yes
Miniconda3 will now be installed into this location:
/root/miniconda3

  - Press ENTER to confirm the location
  - Press CTRL-C to abort the installation
  - Or specify a different location below
# 设置miniconda安装路径
[/home/hadoop/miniconda3] >>> /opt/pkg/miniconda3
Do you wish the installer to initialize Miniconda3
by running conda init? [yes|no]
[no] >>> yes
安装过程会自动修改家目录下的bashrc文件,如下:
...
# >>> conda initialize >>>
# !! Contents within this block are managed by 'conda init' !!
__conda_setup="$('/opt/pkg/miniconda3/bin/conda' 'shell.bash' 'hook' 2> /dev/null)"
if [ $? -eq 0 ]; then
    eval "$__conda_setup"
else
    if [ -f "/opt/pkg/miniconda3/etc/profile.d/conda.sh" ]; then
        . "/opt/pkg/miniconda3/etc/profile.d/conda.sh"
    else
        export PATH="/opt/pkg/miniconda3/bin:$PATH"
    fi
fi
unset __conda_setup
# <<< conda initialize <<<
但是要使之生效还需要手动输入命令:
$ source ~/.bashrc miniconda安装成功之后,在我们的shell前面会有一个base这样的提示,表示我们目前出在miniconda的基础环境当中,我们可以通过以下命令来取消激活base环境
$ conda config --set auto_activate_base false第五步:创建python3.8的虚拟环境
前面我们已经安装好了miniconda的基础环境,接下来我们来通过conda创建Python3.8的虚拟环境
1、配置conda国内镜像
$ conda config --add channels https://mirrors.tuna.tsinghua.edu.cn/anaconda/pkgs/free
$ conda config --add channels https://mirrors.tuna.tsinghua.edu.cn/anaconda/pkgs/main
$ conda config --set show_channel_urls yes
2、创建Python3.8的虚拟环境
$ conda create --name superset  python=3.8

Proceed ([y]/n)? y
3、激活superset环境
(base) [hadoop@ opt]# conda activate superset
(superset) [hadoop@hadoop100 opt]#
4、安装superset依赖
(superset)$ sudo yum install -y python-setuptools
(superset)$ sudo yum install -y gcc gcc-c++ libffi-devel python-devel python-pip python-wheel openssl-devel cyrus-sasl-devel openldap-devel
5、安装或者更新setuptools和pip
(superset)$ pip install --upgrade setuptools pip -i https://pypi.douban.com/simple6、安装superset
# 创建管理员用户
(superset) $ export FLASK_APP=superset
# 安装superset
(superset) $ pip install apache-superset -i https://pypi.tuna.tsinghua.edu.cn/simple/
7、连接mysql的设置安装
(superset)$ pip install mysqlclient -i https://pypi.tuna.tsinghua.edu.cn/simple/
(superset)$ pip install pymssql -i https://pypi.tuna.tsinghua.edu.cn/simple/
(superset)$ pip install pillow -i https://pypi.tuna.tsinghua.edu.cn/simple/
异常处理
注意:如果在执行命令 pip install mysqlclient -i https://pypi.tuna.tsinghua.edu.cn/simple/ 产生错误,错误如下的话
错误如下:
OSError: mysql_config not found
解决:
安装依赖:
(superset)$ sudo yum install gcc gcc-devel python-devel

(superset)$ sudo rpm -ivh https://mirrors.tuna.tsinghua.edu.cn/epel/epel-release-latest-7.noarch.rpm
(superset)$ sudo yum install mysql-devel

(superset)$ pip install mysqlclient -i https://pypi.tuna.tsinghua.edu.cn/simple/如果安装mysql-devel过程中提示缺少mariadb-devel.x86_64或者其他依赖,使用yum install安装即可。
但如果你的虚拟机的mariadb相关包已经被卸载并且替换成了mysql,也可以利用mysql的源来安装mysql-devel,需要注意的是安装的包名很可能不再是mysql-devel而要改成mysql-community-devel.下面是使用mysql源安装mysql-devel的例子
$ sudo rpm -ivh http://repo.mysql.com/mysql57-community-release-el7-8.noarch.rpm
$ sudo yum install mysql-community-devel -y
报错:
GPG 密钥已安装,但是不适用于此软件包。请检查源的公钥 URL 是否配置正确。
解决方法:
在mysql官网搜关键字GPG,找到了解决方案,大意是如果使用的4.1以上版本的rpm的话,除了import mysql的公钥到个人用户的配置中,还需要import mysql的公钥到RPM的配置中。
$ gpg --export -a 3a79bd29 > 3a79bd29.asc
$ rpm --import 3a79bd29.asc
$ rpm --import https://repo.mysql.com/RPM-GPG-KEY-mysql-2022
再次执行:
sudo yum install mysql-community-devel -y8、初始化数据库
(superset)$ superset db upgrade如果出现错误如下
ModuleNotFoundError: No module named 'dataclasses'解决:
#安装dataclasses
(superset) $ pip install dataclasses
问题2:
ImportError: cannot import name ‘soft_unicode’ from ‘markupsafe’这个错误好像是新版本的markupsafe代码变动问题产生的,需要退回到2.0.1
解决办法:
python -m pip install markupsafe==2.0.1
#或者
pip3 install --force-reinstall MarkupSafe==2.0.1
问题3:
ImportError: cannot import name ‘TypedDict’ from ‘typing’ (/opt/module/miniconda3/envs/superset/lib/python3.7/typing.py)出现这个问题的原因是虚拟环境中的python版本低了,因为python3.7缺少TypedDict 这个类型。
解决办法:
删除原环境, 重新创建一个python3.8的环境就行。
以上问题都修改好后, 最后重启初始化数据库:
(superset) $ superset db upgrade8、创建管理员用户
(superset) $ export FLASK_APP=superset

(superset) $ flask fab create-admin
Username [admin]: admin
User first name [admin]: admin
User last name [user]: admin
Email [admin@fab.org]: admin
Password: admin
Repeat for confirmation: admin
注意: 如果 flask fab create-admin 不可用使用, 可以换成如下命令创建用户:
(superset) $ superset fab create-admin第六步:启动superset
以上步骤完成之后,准备启动superset
1、初始化superset
(superset) $ superset init2、安装gunicorn
(superset) $ pip install gunicorn -i https://pypi.douban.com/simple/2、启动superset
(superset) $ superset run -p 8288 -h hadoop100 --with-threads --reload --debugger或者使用以下命令启动
(superset) $ gunicorn --workers 5 --timeout 120 --bind hadoop100:8288 "superset.app:create_app()" --daemon第七步:superset的停止与退出conda环境
如果需要停止superset可以使用以下命令来停止superset
1、停止superset
(superset) [root@node03 opt]# ps -ef | awk '/superset/ && !/awk/{print $2}' | xargs kill -92、退出superset环境
(superset) [root@node03 opt]# conda deactivate第八步:浏览器访问superset
使用浏览器访问地址
输入用户名:admin
密码:admin
第九步:开发superset的启动与停止脚本
vim superset-service.sh#!/bin/bash
superset_status(){
result=<code>ps -ef | awk '/gunicorn/ && !/awk/{print $2}' | wc -l
if [[ $result -eq 0 ]]; then
return 0
else
return 1
fi
}
superset_start(){
# 该段内容取自~/.bashrc,进行conda初始化
# >>> conda initialize >>>
# !! Contents within this block are managed by 'conda init' !!
__conda_setup="$('/opt/pkg/miniconda3/bin/conda' 'shell.bash' 'hook' 2> /dev/null)"
if [ $? -eq 0 ]; then
eval "$__conda_setup"
else
if [ -f "/opt/pkg/miniconda3/etc/profile.d/conda.sh" ]; then
. "/opt/pkg/miniconda3/etc/profile.d/conda.sh"
else
export PATH="/opt/pkg/miniconda3/bin:$PATH"
fi
fi
unset __conda_setup
# <<< conda initialize <<<
superset_status >/dev/null 2>&1
if [[ $? -eq 0 ]]; then
conda activate superset ; gunicorn --workers 5 --timeout 120 --bind hadoop100:8787 --daemon 'superset.app:create_app()'
echo "启动superset,浏览器访问 http://hadoop100:8787"
else
echo "superset正在运行"
fi
}
superset_stop(){
superset_status >/dev/null 2>&1
if [[ $? -eq 0 ]]; then
echo "superset未在运行"
else
ps -ef | awk '/gunicorn/ && !/awk/{print $2}' | xargs kill -9
fi
}
case $1 in
start )
echo "启动Superset"
superset_start
;;
stop )
echo "停止Superset"
superset_stop
;;
restart )
echo "重启Superset"
superset_stop
superset_start
;;
status )
superset_status >/dev/null 2>&1
if [[ $? -eq 0 ]]; then
echo "superset未在运行"
else
echo "superset正在运行, 浏览器访问 http://hadoop100:8787"
fi
esac然后就可以使用命令 superset-service.sh (start|status|stop)来启动superset、查看superset状态、关闭superset了。
启动superset后,打开浏览器访问http://hadoop100:8787
Superset的基础使用
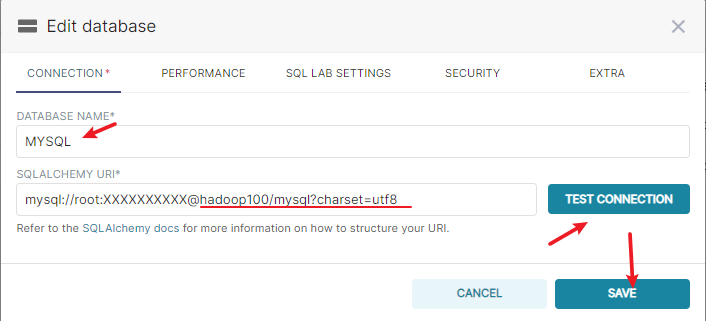
创建数据库连接
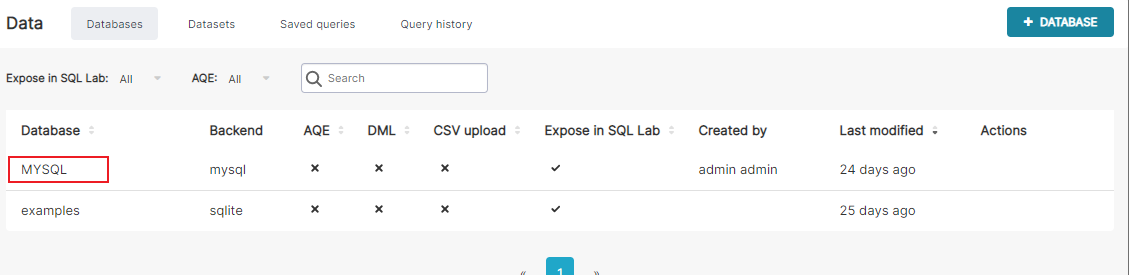
具体配置为
创建数据集

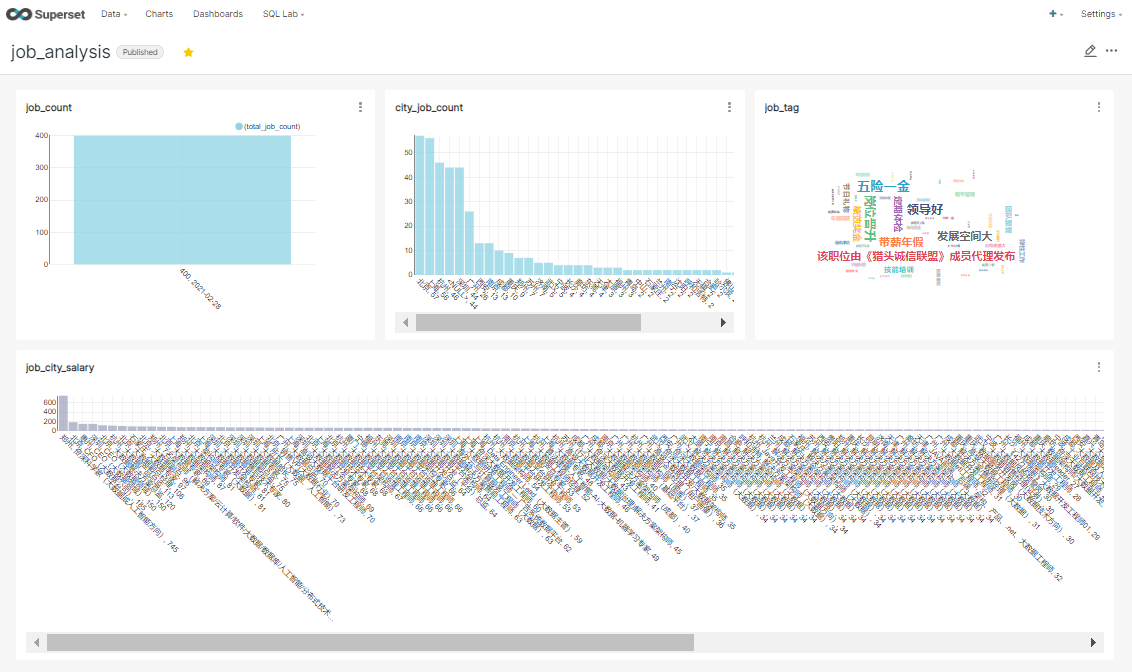
创建图表
根据数据集创建需要展示的图标(Chart)
表1
爬取的总岗位数
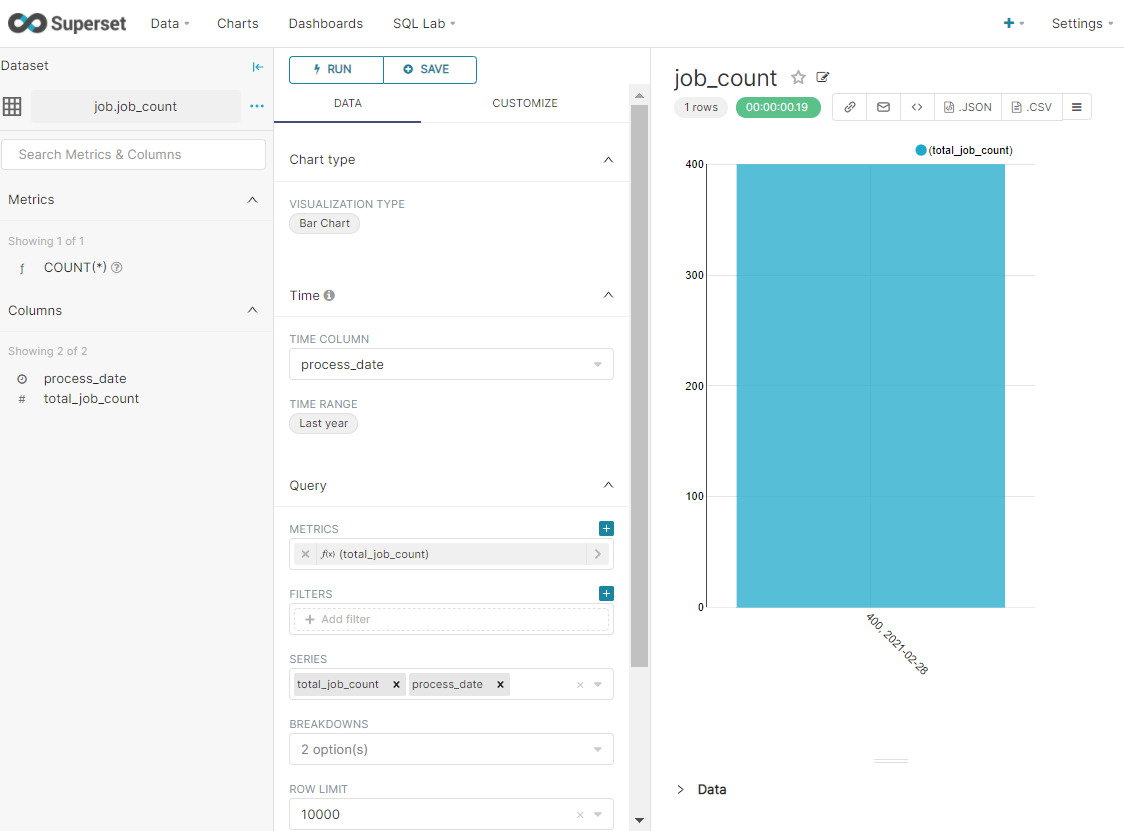
表2
不同城市提供的大数据相关岗位数量比较

表3
不同城市提供的大数据相关岗位的薪资倒序排列 - 取TopN
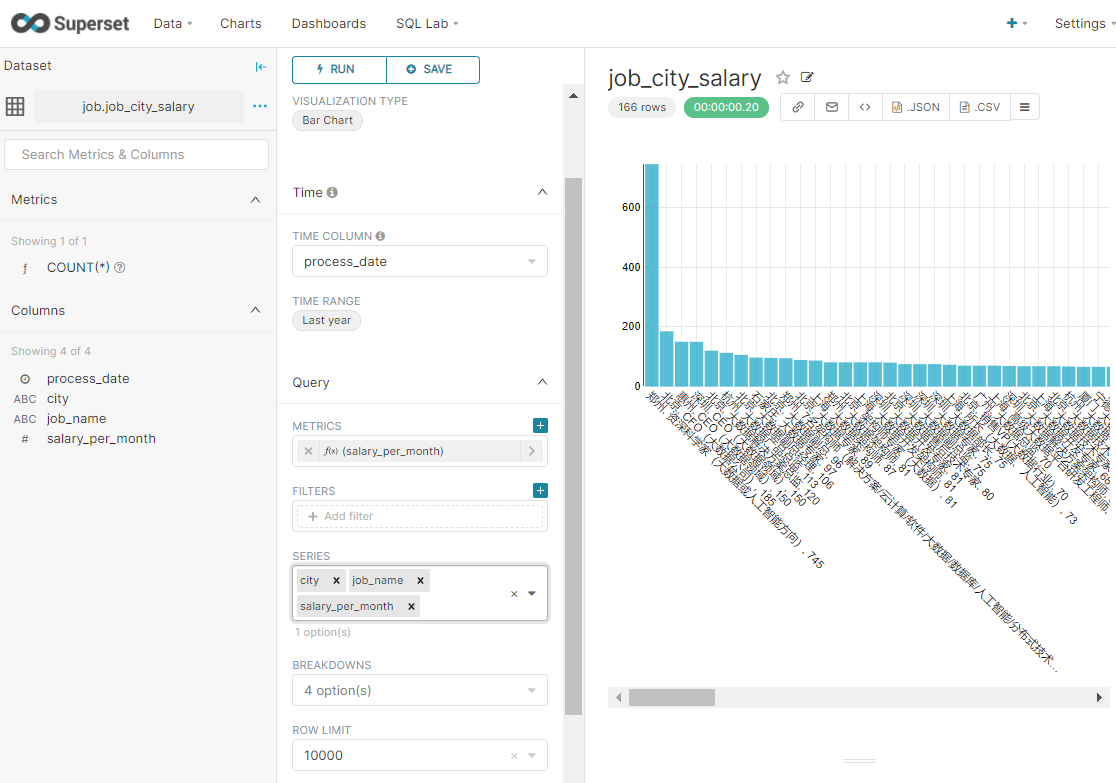
表4
岗位标签做成词云统计

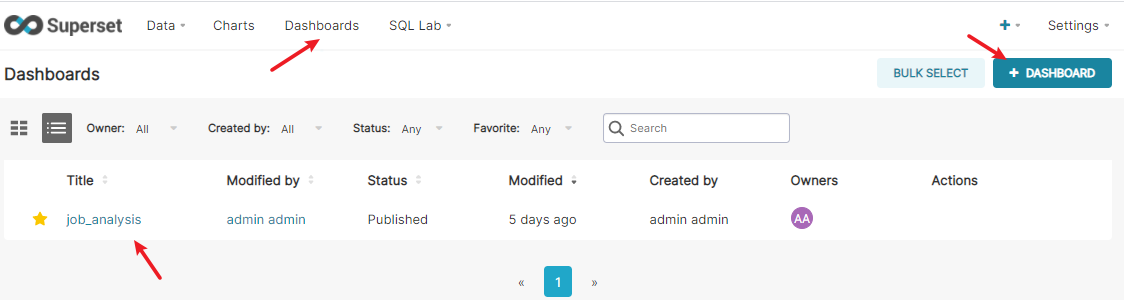
创建仪表盘
仪表盘可以将需要展示的所有图标布局到一起。
布局后
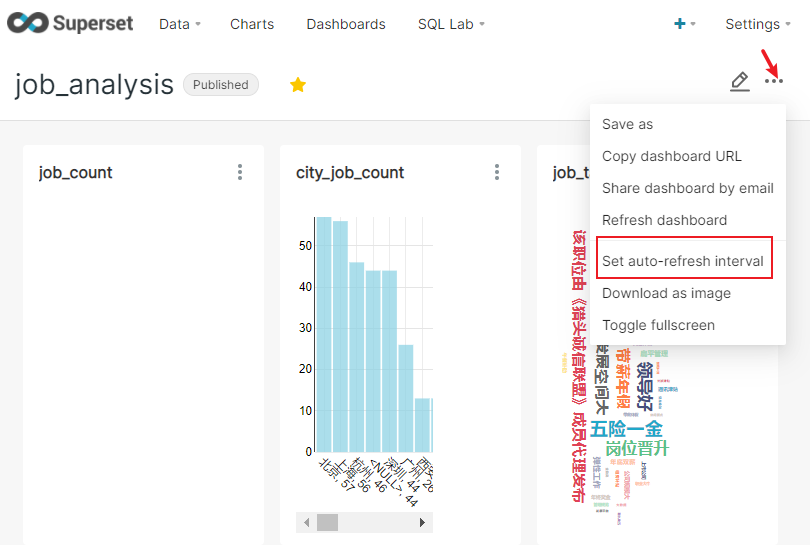
将仪表盘设置为实时更新
如果是需要实时更新数据的表,可以设置同步间隔时间
输入用户名(admin)和密码(admin)登陆即可使用superset进行数据可视化展示。
加载官方示例数据集
superset load-examples由于原因是example数据是存放在github的,可能导致无法直接下载或者下载超时,可提前到官方手动下载文件到本地:
$ wget --no-check-certificate https://github.com/apache-superset/examples-data/archive/refs/heads/master.zip
$ unzip master.zip
$ cd examples-data-master
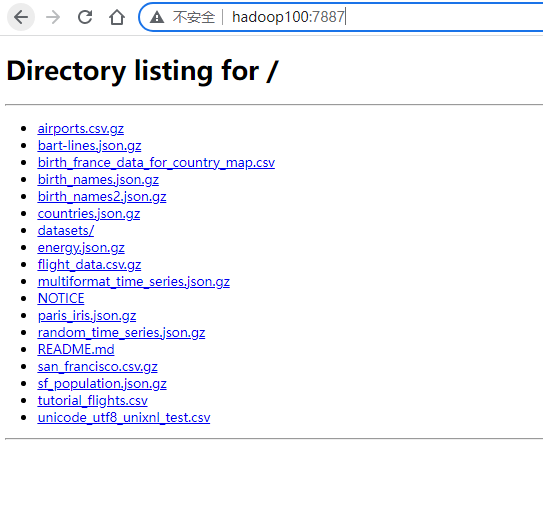
$ $ python3 -m http.server 7887
Serving HTTP on 0.0.0.0 port 7887 (http://0.0.0.0:7887/) ...
第三步,在网址栏输入http://(自己电脑的IP):【端口号】,就可以看到你当时的目录,http服务搭建完成
查找superset安装位置
pip3 list -v | grep apache-supersetcd /opt/pkg/miniconda3/envs/superset/lib/python3.8/site-packages/superset/
sed -i 's/BASE_URL = .*"/BASE_URL = "http:\/\/hadoop100:7887\/"/g' ./examples/helpers.py
sed -i 's/https:\/\/github.com\/apache-superset\/examples-data\/raw\/master\//http:\/\/hadoop100\//g' ./examples/configs/datasets/examples/*.yaml
sed -i 's/https:\/\/github.com\/apache-superset\/examples-data\/raw\/lowercase_columns_examples\//http:\/\/hadoop100:7887\//g' ./examples/configs/datasets/examples/*.yaml
sed -i 's/https:\/\/raw.githubusercontent.com\/apache-superset\/examples-data\/master\//http:\/\/hadoop100\//g' ./examples/configs/datasets/examples/*.yaml
保存好
再回到最开始尝试:
superset load-examples最后重新初始化superset
superset init登录superset网站,查看示例数据集和示例图标:
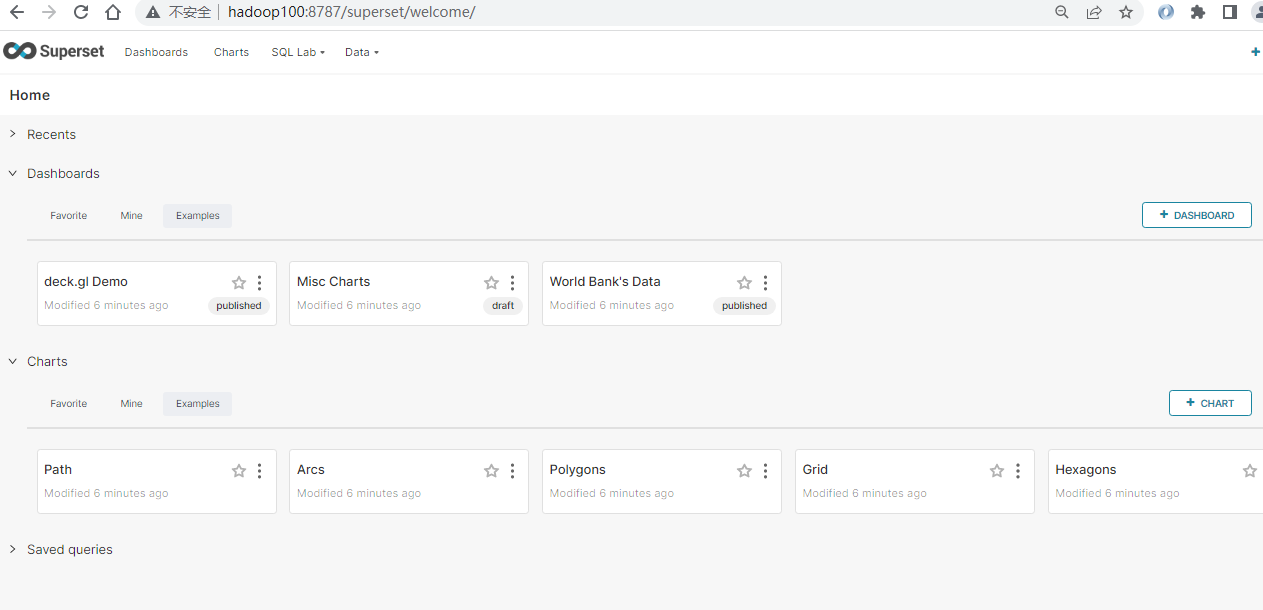
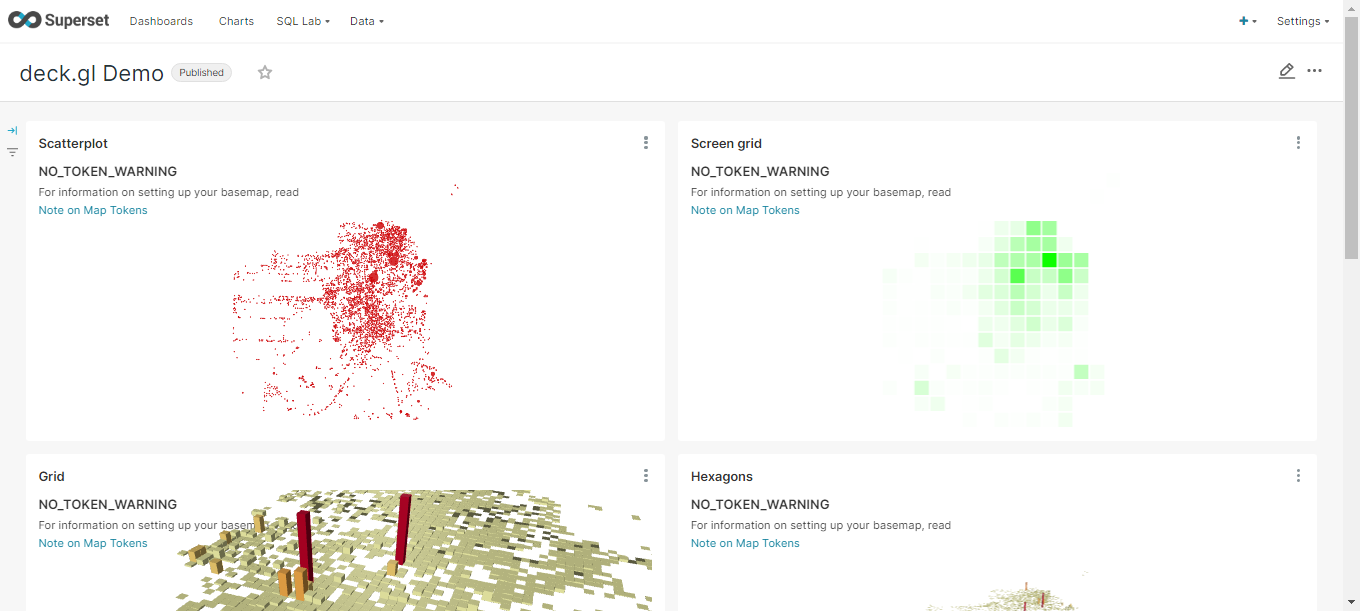
Views: 77